post

Curvy Celebrations

Stampin’ Up! Curvy Celebrations ~ Three Cards and Tutorial

This Brand New and Exclusive Bundle is Available for a Very Limited Time ~ All Occasion Suite of Stamps, Dies and Designer Series Paper

I just received my Quite Curvy Bundle, which is just a part of the full Curvey Celebrations Bundle, and I am making a few cards for you. I think you will agree, they’re Awesome!

You can make Christmas Cards, New Year’s Cards, Valentine’s Cards and almost any occasion with this amazing bundle.

My personal favorite part of this suite is that they are CURVY, lol yep, no straight lines here. The most versatile set I have played with in a long time.

I have a list of the supplies below, so you can replicate any of these cards and create 100’s more. Plus there is a PDF download below showing all of the features of the suite.

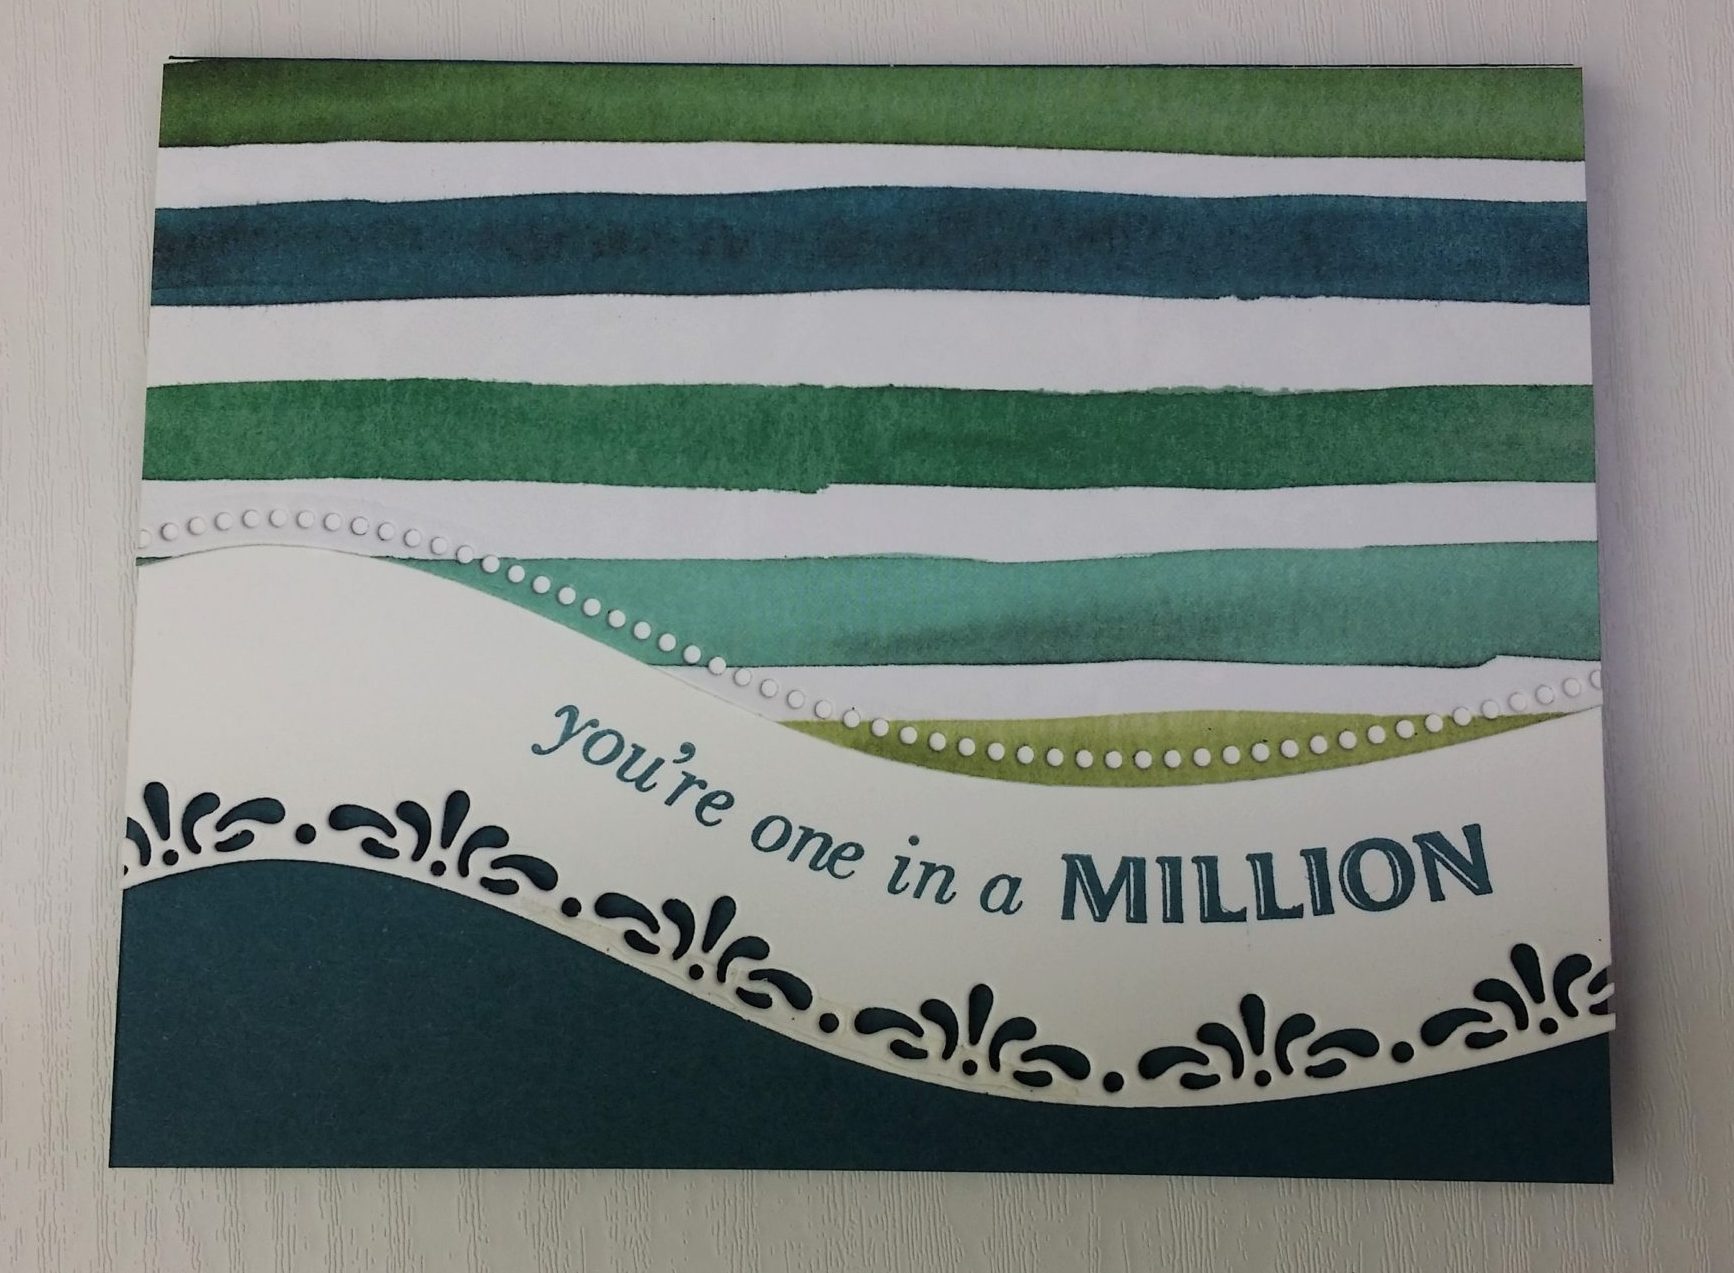
Card #1 ~ You’re One in a Million

Stampin Up Curvy Celebrations Larris Livin Lite
All Images © Stampin’ Up! ~ Curvy Celebrations Tutorial Larris Livin Lite

See the full video tutorial on my YouTube Channel.

I just love this font, I am currently adoring the deep Pretty Peacock ink and cardstock and the Forever Greenery designer series paper here is just FUN!

Card #2 ~ Wishing You the Happiest of Birthdays!

Stampin Up Curvy Celebrations Larris Livin Lite
All Images © Stampin’ Up! ~ Curvy Celebrations Tutorial Larris Livin Lite

Now, I hope you will agree… This card is just stunning! It is crisp, striking, classic, clean, all of the good feels…

I used the Peony Garden designer series paper in a very subdued pattern of peonies in gray and white. Then gave it a great punch with the basic black cardstock, on a white background. The only color I brought in is the very light petal pink. So pretty!

Card #3 ~ Thinking of You Makes My Day!

Another card featuring the Forever Greenery designer series paper. Gorgeous! If you love teal, turquoise and all the deep greenery colors, this is one you cannot pass by without admiring. I also added some rhinestones from last year’s Noble Peacock suite, unfortunately, they are no longer available. However, I think the Holiday Rhinestones #150457 and the Rhinestone Basic Jewels #144220 will work just as well here.

Stampin Up Curvy Celebrations Larris Livin Lite
All Images © Stampin’ Up! ~ Curvy Celebrations Tutorial Larris Livin Lite

I hope you will make some cards with this versatile suite. I also hope my tutorial and photos have inspired you to make something beautiful!

Remember, it is not just making the cards, but we need to send them in the mail (or hand deliver when possible.) Now more than ever, we need to remind people that we are thinking of them, we celebrate them, love them and miss their faces!!

Just like I miss your face! Please leave me a comment if you are still here with me 🙂 and don’t forget to tag me in social if you are inspired by my cards, watch my YouTube video tutorial and give it a thumbs up if you enjoy.

Larri Signature

Supplies:

Supply List Card #1

  • Pretty Peacock Cardstock #150880
  • Whisper White Cardstock #100730
  • Forever Greenery DSP #152492
  • Pretty Peacock Classic Stampin’ Pad #150083

Supply List Card #2

  • Whisper White Cardstock #100730
  • Basic Black Cardstock # 121045
  • Petal Pink Cardstock # 146985
  • Peony Garden DSP #152483
  • Basic Gray Classic Stampin’ Pad # 149165

Supply List Card #3

  • Pretty Peacock Cardstock #150880
  • Whisper White Cardstock #100730
  • Forever Greenery DSP #152492
  • Pretty Peacock Classic Stampin’ Pad #150083
  • Rhinestones Basic Jewels #146924

Tools

  • Clear Block “H” #118490
  • Stampin’ Pierce Mat #126199
  • Simply Shammy #147042
  • Stampin’ Dimensionals #104430
  • Stampin’ Seal #152813
  • Any Die Cut or Embossing Machine or the
  • Stampin’ Cut & Emboss Machine #149653

Download the PDF Flyer Here!

Stampin Up Curvy Celebrations Larris Livin Lite
All Images © Stampin’ Up! ~ Curvy Celebrations Tutorial Larris Livin Lite

If you make this card, please post a picture and tag me #LarrisLivinLite

Can’t wait to see what you think… Happy Craftin’

post

Tropical Oasis

Stampin’ Up! Tropical Oasis ~ Thank You Card Tutorial

These were really fun cards to make.

The colors are so fun and the stamp set I used, Stampin’ Up! Tropical Oasis just makes me happy! Very Hawaiian in my eyes and makes me feel like I’m on vacation!

I’ll have a list of the supplies I used to achieve this look. There is also a FREE PDF for you to download below!

Stampin' Up! Tropical Oasis Larris Livin Lite
All Images © Stampin’ Up! ~ Tropical Oasis Tutorial Larris Livin Lite
Vote for Larris Livin Lite

This month I am participating in Kylie’s Monthly International Blog Highlights! Woot.

How fun is that?! So, Please take a look at my card and tutorial below, then please Vote for Larri!

Vote for Larris Livin Lite

I simply embossed the Terra Cotta Tile cardstock with the Basket Weave embossing folder, then cut a circle out of it (using the layering circle dies), sort of off to the right side, making a “window” where you can see through to the front of the card.

Then on the front of the card, I lined up my “thanks” stamp with this new window and stamped once with the Soft Suede ink pad. Then I stamped again with the Versamark and added the Clear Stampin’ Emboss Powder before heat setting this greeting.

This is a terrific embossing technique for getting the exact color you want while also added a high gloss and raised image from the clear embossing powder.

The flowers were all stamped on the Whisper White Heavy cardstock with the Soft Suede ink. I then die cut the images and used our sponge daubers to just add a little color around them. I just dabbed on some Mango Melody, Terra Cotta Tile and a little Daffodil Delight.

The leaves were all stamped on the Whisper White Heavy cardstock with Pear Pizzazz Ink and die cut.

I then just put everything together. Added a layer of the Braided Burlap Trim, glued the flowers and leaves on top, then added 3 of the gorgeous Champagne Rhinestones to each of the small flowers.

This is definitely a multi-step card, however, it was fun and not difficult at all.

Supplies:

(all measurements in inches)

  • Card Base ~ Very Vanilla Cardstock 11 x 4.25 Scored at 5.5
  • Layer 1 ~ Terracotta Tile Cardstock 5.25 x 4
  • Scraps ~ Whisper White HEAVY Cardstock
  • Timeless Tropical Bundle Stamps & Dies #153811
  • Coastal Weave 3D Embossing Folder #151503
  • Seriously the Best Stamps #151712
  • Layering Circles Framelits #151770
  • Soft Suede Ink Pad #147115
  • Terracotta Tile Ink Pad #150086
  • Daffodil Delight Ink Pad #147094
  • Mango Melody Ink Pad #147093
  • Pear Pizzazz Ink Pad #147104
  • Old Olive Ink Pad #147090
  • Versamark Ink Pad #102283
  • Clear Stampin’ Emboss Powder #109130
  • Braided Burlap Trim #151254
  • Champagne Rhinestone Basic Jewels #151193

Download the Free PDF Tutorial Here!

Stampin Up Tropical Oasis Tutorial Free PDF

If you make this card, please post a picture and tag me #LarrisLivinLite

Can’t wait to see what you think… Happy Craftin’

Larri Signature

PS Don’t forget, Vote for Larri Here!

Vote for Larris Livin Lite
post

Beach Happy

Beach Happy Larris Livin Lite

Today I am sharing a card I made using the super fun Beach Happy stamp set from Stampin’ Up! I just adore this stamp set and thought I would even share it with Kylie’s International Blog Highlights for April 2019. You can find this stamp set in the 2019 Occasions Catalog pg 37.

The theme is “Encouragement” so I used the sentiment Wishing You Sunny Days, included in the Beach Happy set.

The colors I chose were Lovely Lipstick, Powder Pink, Soft Sea Foam with a tiny bit of Crumb Cake. I used some glycerin with my sponge daubers to blend the background using the Soft Sea Foam for the sky and some Crumb Cake for the beach sand.

I also pulled in the Seaside embossing folder for the look of waves on the layer of Soft Sea Foam cardstock.

So, what do you think?

If you like this note of encouragement as much as I do, please Vote for Me here in this awesome International Blog Highlight. If I receive enough votes I may be able to participate in Kylie’s upcoming Blog Hop!! Whoot Whoot!

Vote for my Beach Happy Card if you LOVE it!

Feel free to email me with any questions and if you would like to shop my Stampin’ Up! store you can click here!

Hope to see your vote today and I will catch you in the next post!

Larri Signature